 how-to
Troubleshooting Radio Cable Connection Issues: A Step-by-Step Guide
Table of Contents
- Why Radio Cable Connection Problems Happen
- What You'll Need Before Starting Diagnostics
- Step 1: Check Your Radio for Power and Basic Function
- Step 2: Inspect Power and Ground Wiring
- Step 3: Examine the Wiring Harness and Radio Connector
- How to Fix Radio Driver Errors on Your Computer
- COM Port Not Showing for Radio Cable: Diagnosis and Solutions
- Resolving Radio Programming Software Connection Error Messages
- Summary Table: Troubleshooting Workflow
- Frequently Asked Questions
Last Updated: October 5, 2026
Why Radio Cable Connection Problems Happen
A radio cable connection problem can stop your entire programming workflow: your radio won't communicate with your computer, your software shows errors, and nothing transfers.
The culprits are usually simple, a loose wire, corroded connector, blown fuse, or bad ground, each breaking the data link between radio and computer. Most people skip diagnostics and buy new cables, wasting money. A methodical approach catches the real problem in minutes.
What You'll Need Before Starting Diagnostics
Gather these tools before troubleshooting your radio cable connection:
- A multimeter (digital or analog, either works)
- A flashlight or headlamp for tight spaces
- Small wire strippers
- Needle-nose pliers
- Your vehicle's fuse box diagram (check your owner's manual or search online)
- A clean cloth or contact cleaner
- Your radio's user manual
- The original cable or a known-good cable to test with
Having these ready means no time wasted hunting for tools mid-diagnosis. Keep your multimeter nearby, you'll use it multiple times.
Step 1: Check Your Radio for Power and Basic Function
Before digging into wiring, confirm the radio has power. A radio with no power won't communicate with your computer, no matter how good your radio cable connection is.
Turn on your vehicle. If the display lights up, power is reaching the radio, move to the next step. If not, you have a power problem: a blown fuse, bad power wire, or dead radio. Test it first.
Diagnosing a Radio That Will Not Power On
A radio that won't power on won't program, receive, or transmit.
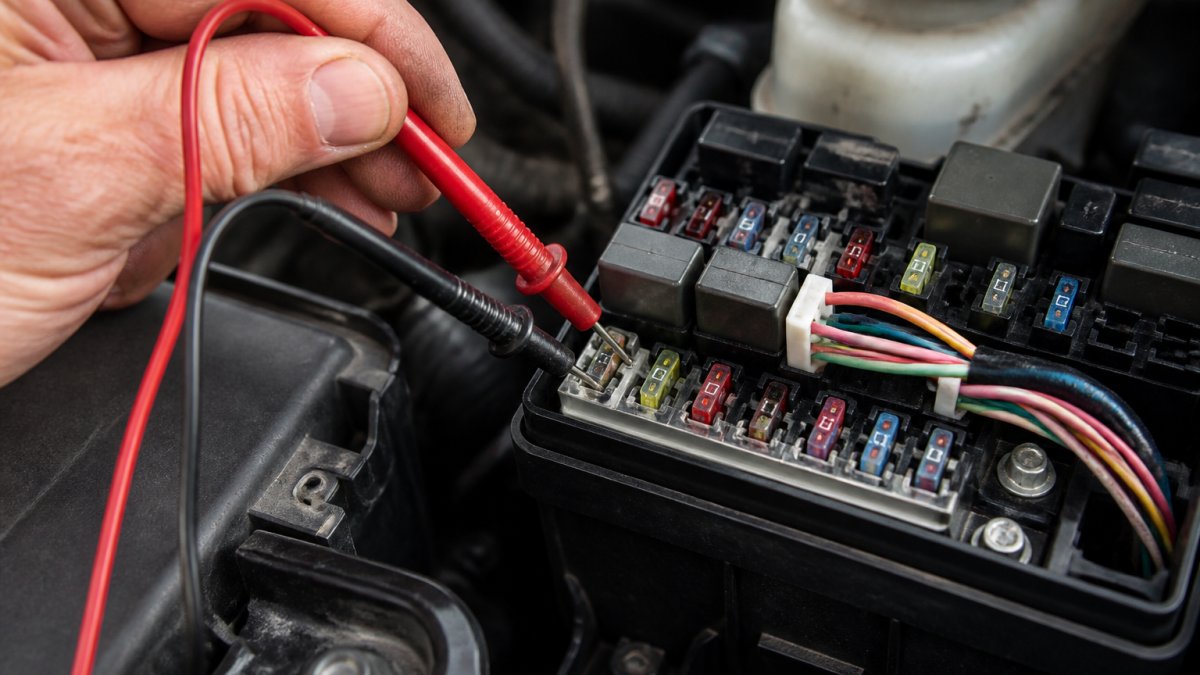
Start with the fuse. Most car radios have a dedicated fuse in the vehicle fuse box that protects against electrical surges; when it blows, the radio loses power instantly. Find the fuse labeled for the radio or "ACC" (accessory power) on your fuse box diagram, pull it out, and hold it to light. A good fuse has a thin wire inside; a blown one has a broken wire or blackened interior. Replace a blown fuse with one of the same amperage, then flip the ignition to "On." If the radio lights up, you fixed it. If not, move to the next section.
Checking Fuses and the Vehicle Fuse Box
The vehicle fuse box sits under the dashboard or hood; your owner's manual shows the exact location. The diagram inside the cover lists every fuse and what it protects.
Find the radio fuse and pull it straight out with a fuse puller or needle-nose pliers. Inspect it for a broken filament, black or brown discoloration, or corroded contacts. A corroded contact can cause intermittent power loss, so even if the fuse looks okay, replace it with a fresh one of the same amperage, it costs less than a dollar.
Push the new fuse in firmly until it clicks and turn on the radio. If it powers on, you're done. If not, the problem is deeper, move to Step 2.
Step 2: Inspect Power and Ground Wiring
Power and ground wires are the backbone of your radio. A radio cable connection depends on both: if either is loose, corroded, or damaged, data won't transfer.
Testing Voltage at the Radio
Use a multimeter set to DC voltage to test whether power is actually reaching the radio.
Locate the radio's wiring harness, the bundle of wires plugged into the back of the radio; you may need to remove the radio from the dashboard to access it. Find the red power wire, place the multimeter's red probe on it, and the black probe on a metal part of the vehicle frame (a ground point). Turn the ignition to "On" (not "Start").
A healthy power wire shows 12-14 volts. If it shows 0 volts, power isn't reaching the radio, check the fuse again and inspect the power wire for breaks or loose connections. If it shows 12-14 volts, power is good; move to the ground test.
Checking Ground Continuity
A ground wire completes the electrical circuit; without a good ground, current can't flow and your radio won't work. Ground continuity means the wire has a solid, unbroken path to the vehicle frame.
Set your multimeter to "Ohms" (Ω) to measure resistance. Find the black (or brown) ground wire in the harness, place the red probe on it and the black probe on a clean metal part of the frame.
If the reading is high, the ground wire may be loose at the connection point, corroded inside the insulation, damaged or pinched, or attached to a painted or dirty surface. Clean the connection, strip back the insulation slightly, scrape away paint or corrosion, reattach to bare metal, and test again.
Step 3: Examine the Wiring Harness and Radio Connector
The wiring harness is the bundle of colored wires connecting your radio to the vehicle's electrical system; the radio connector is the plastic plug at its end. Both can cause radio cable connection failures, loose wires, corroded pins, or damaged connectors all break the link.
Finding Loose, Corroded, or Damaged Connections
Unplug the wiring harness from the radio and inspect the connector pins inside the plug. Corroded pins look dull, dark, or discolored, sometimes with a white or green coating that blocks electrical contact. Loose pins wiggle when touched; they should be snug and firm.
For corrosion, clean the pins with contact cleaner or fine sandpaper and let them dry completely. RT Systems, Inc. offers high-quality programming cables with reliable connectors designed to work with numerous radio brands.
Reseat the connector firmly until it clicks and doesn't wiggle, then test. If the radio powers on and your software connects, you've fixed it. If not, the problem may be internal damage requiring professional repair or replacement.
How to Fix Radio Driver Errors on Your Computer
A driver error means your computer doesn't recognize your radio cable, so the operating system can't talk to it and your programming software can't access the radio.
These usually mean the cable isn't plugged in, is in a bad USB port, or has missing, outdated, or broken driver software.
Start simple: unplug the cable, wait 10 seconds, plug it back in, and restart your computer.
If you're using an RT Systems, Inc. cable, visit the RT Systems, Inc. website for driver downloads and installation guides.
If the error persists, the cable hardware may be defective. Test the cable on another computer if possible. If the error appears on every computer, the cable needs replacement.
COM Port Not Showing for Radio Cable: Diagnosis and Solutions
A missing COM port means your computer isn't assigning a serial connection to your cable, so your programming software can't find it to send data.
Open Device Manager (Windows Key + X), expand "Ports (COM & LPT)," and look for your cable, it might say "USB Serial Port" or "Prolific USB-to-Serial Comm Port." If you see it, note the COM port number, which your programming software needs.
If it's missing, try these fixes:
- Unplug the cable, wait 30 seconds, plug it back in, and refresh Device Manager (F5).
- Try a different USB port.
- Restart your computer with the cable plugged in.
- Update or reinstall the driver.
If the cable still doesn't appear, it may be using a non-standard chipset. Some third-party cables use older chipsets that don't work with Windows 11. RT Systems, Inc. cables use reliable FTDI chipsets that are widely supported across operating systems and Windows versions.
Resolving Radio Programming Software Connection Error Messages
Connection errors happen when your programming software can't reach your radio through the cable.
The cause could be the radio being off, a loose cable, the wrong COM port selected, a loose wiring harness, a bad ground, or a defective cable.
Start with the basics: turn on the radio and confirm it has power.
If it still fails, unplug the cable from the radio, inspect the connector for corrosion or loose pins (see Step 3), clean if needed, and reseat firmly.
For reliable cables that work consistently, RT Systems, Inc. offers high-quality programming cables designed to eliminate connection errors.
Summary Table: Troubleshooting Workflow
| Problem | First Check | Expected Result | Next Step |
|---|---|---|---|
| Radio won't power on | Fuse in fuse box | Fuse should not be broken | Replace fuse or test voltage |
| No voltage at radio | Multimeter on red power wire | 12-14 volts DC | Check fuse and power wire |
| Poor ground connection | Multimeter ohms on black ground wire | 0-1 ohms | Clean ground connection |
| Corroded connector | Visual inspection of pins | Pins should be shiny | Clean with contact cleaner |
| Driver not recognized | Check Device Manager | Cable listed under Ports | Reinstall driver software |
| COM port missing | Device Manager Ports | COM port number visible | Try different USB port |
| Connection error | Verify COM port in software | Software shows correct port | Inspect cable connector |
Radio cable connection issues stop your programming workflow cold. But most problems are simple: a blown fuse, a loose wire, a corroded pin, a missing driver.
Follow this diagnostic sequence. Test power. Check ground. Inspect connectors. Verify drivers. You'll isolate the problem in minutes, not hours.
When you need a cable that works reliably the first time, RT Systems, Inc. provides high-quality programming cables with proven FTDI chipsets and extensive support for numerous radio brands. Get started with RT Systems, Inc. and eliminate the frustration of troubleshooting bad cables and incompatible adapters.
Frequently Asked Questions
Why is my radio programming cable not recognized by my computer?
A radio programming cable not recognized usually points to three culprits: missing or outdated drivers, a faulty USB port, or a damaged cable. Start by checking Device Manager on Windows to see if the cable appears as an unknown device. If it does, update the driver. If it doesn't appear at all, try a different USB port on your computer or test the cable on another computer to isolate the problem. A quality cable with an FTDI chipset will register reliably if the drivers are current.
How do I test a radio cable connection with a multimeter?
Set your multimeter to voltage mode (DC volts). With the radio powered on, touch the red probe to the power wire and the black probe to ground. You should read 12-14 volts. Then test continuity by switching to continuity mode and probing the ground wire to a known ground point on the vehicle chassis. A steady tone means good continuity. Test the antenna cable connection separately by checking for continuity between the antenna connector contacts. If readings are zero or inconsistent, the wiring or connections need repair.
What should I check before programming a radio to avoid connection errors?
Before programming, verify that your radio powers on and responds to controls. Check that all wiring connections are tight and free of corrosion. Inspect the radio connector contacts for damage or bent pins. On your computer, confirm the radio cable driver is installed and the correct COM port is assigned in Device Manager. Test the cable on another computer if available. Finally, ensure your programming software is compatible with your specific radio model and that you're using the correct cable type for your radio brand.
Can a USB port or adapter cause radio programming connection problems?
Yes, USB ports and adapters are common sources of connection failures. Try plugging the cable into a different USB port on your computer, preferably a USB 2.0 port if your machine has one. USB hubs and extension cables can also cause intermittent connections; connect directly to your computer instead. If you're using a USB-C adapter, verify it supports data transfer, not just charging. A faulty adapter will prevent the cable from registering properly, so test with a known-good adapter or cable on another computer to confirm the adapter is the issue.