 how-to
How to Fix Radio Driver Errors: Step-by-Step Guide
Table of Contents
- Why Radio Driver Errors Happen on Windows
- Before You Start: What You'll Need
- Step 1: Confirm the Error in Device Manager
- Step 2: USB to Serial Driver Installation Done Right
- Step 3: Fix a Radio Programming Cable Not Recognized
- Step 4: Troubleshooting COM Port Errors
- Step 5: Advanced Fixes for Stubborn Radio Driver Errors
- Common Mistakes to Avoid
- Frequently Asked Questions
Last Updated: September 14, 2026
Why Radio Driver Errors Happen on Windows
Radio driver errors almost always trace back to one of three culprits: a Windows update that replaced or corrupted the driver, a chipset mismatch between your programming cable and its installed driver, or a COM port that another program has locked. This guide from RT Systems, Inc. walks through the fixes in the order that resolves the most cases fastest, from a two-minute Device Manager check to command-line resets that clear problems the built-in troubleshooters miss.
The frustration is well documented. Users frequently report that Windows Insider and standard OS updates trigger "Generic Bluetooth Radio" errors, forcing a manual removal and reinstallation of drivers to restore functionality (Microsoft Community Forums driver error threads). The same pattern hits USB to serial driver installation for radio programming cables: Windows installs a generic driver, the cable stops responding, and the radio software reports no connection.
Here's the part most guides get wrong. The problem is rarely the cable itself. It's almost always the driver layer sitting between the cable and your radio software.
Before You Start: What You'll Need
Gather these before you begin, so you're not hunting for a download mid-troubleshoot:
- Your radio programming cable (USB to serial, or a direct USB model)
- The correct driver installer for your cable's chipset, downloaded from the manufacturer
- Administrative access to your Windows account
- Your radio programming software installed and closed
- A note of your current COM port assignment (Device Manager > Ports)
One warning before you touch anything: unplug every other USB peripheral you don't need. Wireless mice, dongles, and hubs can interfere with port detection, and troubleshooting gets confusing fast when three devices are competing for the same resources.
Step 1: Confirm the Error in Device Manager
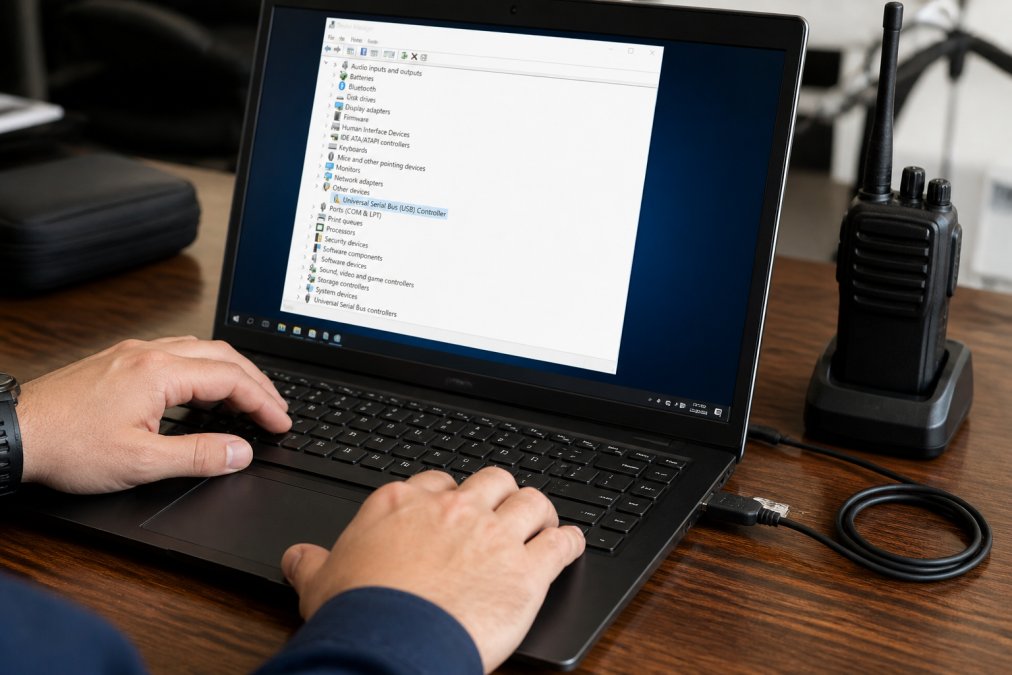
Open Device Manager and look for a yellow warning triangle. That triangle tells you exactly which device failed and gives you the error code to work from. Press Windows + X, select Device Manager, and expand Ports (COM & LPT) and Universal Serial Bus controllers.
A healthy cable shows up as a named COM port, something like "USB Serial Port (COM4)." A problem cable shows one of these:
- A generic entry with a yellow triangle, often labeled "Unknown Device"
- A "Generic Bluetooth Radio" entry if Windows misidentified the hardware
- A COM port that appears, then vanishes when you plug the cable in
Reading the Error Code and Hardware ID
Right-click the flagged device, choose Properties, and open the Details tab. Under Property, select Hardware Ids. You'll see a string like USB\VID_0403&PID_6001. That VID/PID pair identifies the chipset inside your cable, and it's the single most useful piece of information you can have. Match it against the driver you're about to install. If they don't match, no amount of reinstalling will fix the connection.
The General tab shows the error code itself. Code 10 ("This device cannot start") and Code 43 ("Windows has stopped this device") are the two you'll see most often with programming cables, and both point to driver-level faults rather than dead hardware (ERROR CODE 10 & 43 on my Driver INTEL R Wifi 6 AX201).
Step 2: USB to Serial Driver Installation Done Right
Successful USB to serial driver installation depends on installing the driver before you plug in the cable, and on matching the driver to the exact chipset inside it. Technical support guidance is consistent on this point: treat the driver set as a single unit and perform a clean installation rather than layering a new driver over an old one (Intel Community Support driver guidance).
Follow this order:
- Unplug the cable from the computer
- Open Device Manager and uninstall any existing entry for the cable, checking Delete the driver software for this device
- Reboot, even if Windows doesn't ask you to
- Run the manufacturer's driver installer and let it finish completely
- Plug the cable back in and wait for Windows to complete setup
- Confirm the new COM port appears in Device Manager
Why Chipset Type Matters for Programming Cables
Not all programming cables use the same chipset, and each chipset needs its own driver. A cable built around an FTDI chip needs the FTDI virtual COM port driver. Cables using other common serial chipsets need their respective drivers. Installing the wrong one produces a device that looks connected but never opens a port your radio software can use.
This is where cheap cables cause the most grief. If you don't know what's inside your cable, the Hardware ID from Step 1 tells you. Look up the VID/PID, download the matching driver, and install it clean. RT Systems, Inc. provides high-quality programming cables with FTDI chipsets.
Step 3: Fix a Radio Programming Cable Not Recognized
A radio programming cable not recognized by Windows is usually a driver or port-conflict problem, not a dead cable. Work through these checks in order:
- Try a different USB port, preferably one directly on the motherboard rather than a hub
- Test the cable on another computer to isolate whether the fault follows the cable
- Check Device Manager for a device that appears only while the cable is plugged in
- Disable USB selective suspend in Power Options, which can cut power to idle ports
- Try a different cable if you have one, to rule out a broken connector
If the cable shows up in Device Manager but your radio software still can't see it, the problem has moved from "not recognized" to "port not opening," which is the next step.
Step 4: Troubleshooting COM Port Errors
Troubleshooting COM port errors starts with confirming the port exists, then confirming nothing else has claimed it. In Device Manager, right-click your cable's COM port, open Properties, then Port Settings, and click Advanced. Check the COM port number assigned. If it's above COM9, some older radio software won't see it, so reassign it to a lower number if one is free.
Releasing Ports Locked by Other Software
A COM port can only be used by one program at a time. If your radio software reports that the port is busy or unavailable, something else grabbed it first. Common offenders include:
- Another programming application left running in the background
- A serial terminal or logging tool you forgot to close
- A sync utility for a phone, GPS unit, or other serial device
- A background process from a previous session that didn't shut down cleanly
Close everything that could touch a serial port, then open Task Manager and end any lingering processes. Restart the Bluetooth Support Service if you're dealing with a wireless connection: open services.msc, find Bluetooth Support Service, and restart it. A stopped service produces connection failures that look identical to driver faults.
Step 5: Advanced Fixes for Stubborn Radio Driver Errors
When the standard fixes stall, the remaining causes are firmware-level settings, peripheral conflicts, and corrupted system files. These are the fixes most guides skip, and they resolve the cases that survive a clean reinstall.
BIOS/UEFI and Peripheral Conflicts
Boot into your BIOS or UEFI settings and check that USB controllers are enabled and set to full functionality rather than a legacy compatibility mode. Some motherboards ship with USB legacy support enabled, which can limit how modern devices enumerate. While you're there, confirm no port is disabled.
Peripheral conflicts are subtler. A wireless mouse receiver, a Bluetooth dongle, and your programming cable can all compete for USB resources. Unplug everything except the cable and a wired keyboard, then test. If the cable works in isolation, add devices back one at a time until the failure returns. That device is your conflict.
Command Prompt and Rollback Procedures
Two command-line fixes clear problems the graphical tools can't reach. Open Command Prompt as administrator and run sfc /scannow to repair corrupted system files, then DISM /Online /Cleanup-Image /RestoreHealth to repair the system image itself. Both take several minutes; let them finish.
If the errors started right after a Windows update, roll the driver back instead. In Device Manager, open the device's Properties, go to the Driver tab, and select Roll Back Driver. If that option is grayed out, uninstall the device with Delete the driver software checked, reboot, and install the manufacturer's driver fresh. Windows Update patches sometimes ship a driver that overwrites a working one, and a rollback is faster than chasing the newer version.
Common Mistakes to Avoid
The most common mistake is reinstalling the driver without first uninstalling the old one. Layering a new driver over a corrupted one leaves both in place, and Windows picks whichever it prefers, often the broken one.
Second: assuming the cable is dead because Windows says so. A cable that fails on one machine frequently works fine on another with the correct driver installed. Test before you replace.
Third: ignoring the Hardware ID. It takes thirty seconds to read and tells you definitively which driver you need. Guessing wastes an hour.
Radio driver errors are a solvable problem, but only when you work through the layers in order: confirm the error, match the driver to the chipset, clear the port, then escalate to firmware and command-line fixes. That's the approach RT Systems, Inc. has refined over 20+ years of supporting radio programming. Our cables ship with FTDI chipsets and our software is designed for ease of use. If you're tired of fighting generic drivers and want a programming setup that connects reliably, get started with RT Systems, Inc. and spend your time on the air instead of in Device Manager.
Frequently Asked Questions
Why does my computer show a driver error for my radio programming cable?
Most radio programming cables use a USB-to-serial chipset that Windows does not always recognize automatically. When the chipset driver is missing, outdated, or corrupted, Device Manager flags the cable with a yellow warning icon. Windows updates can also replace a working driver with a generic one that does not communicate properly with your radio. Installing the correct driver for your cable's chipset, then rebooting, resolves most of these radio driver errors.
Are radio driver errors caused by Windows updates?
They can be. Windows Insider and standard OS updates sometimes replace a working cable driver with a generic version or trigger a 'Generic Bluetooth Radio' style error that requires manual removal and reinstallation. If your cable worked before an update and stopped after, open Device Manager, uninstall the device, reboot, and reinstall the manufacturer's driver. Rolling back the recent update is another option when the problem started immediately after patching.
How do I know if I have the correct driver for my radio cable?
Check Device Manager for the exact chipset name under Ports (COM & LPT). If it shows a generic label or a warning icon, the driver is wrong or missing. Compare the Hardware ID in the device properties against the chipset your cable actually uses. Downloading the driver directly from the cable or software manufacturer, rather than relying on Windows Update, is the most reliable way to confirm you have the right driver for radio programming.
What should I do if my radio is not recognized by the programming software?
First confirm the cable appears in Device Manager with a valid COM port number. Then check that the software is set to that same port. If the port is missing, reinstall the USB to serial driver and try a different USB port, preferably one directly on the computer rather than a hub. Also verify the cable is fully seated in the radio and that the radio is powered on. These steps resolve most cases where a radio programming cable is not recognized.