 how-to
How to Bulk Import Repeater Frequencies
Table of Contents
- What You'll Need Before Importing Repeater Frequencies
- Downloading Repeater Data and Importing CSV Files to Radio Software
- Step-by-Step Process: How to Bulk Import Repeater Frequencies
- Troubleshooting Radio Frequency Import Errors
- RT Systems Programming Software Features for Bulk Frequency Management
- Managing Memory Channels and Band Plans
- Compliance and Best Practices for Frequency Coordination
- Frequently Asked Questions
Last Updated: September 23, 2026
What You'll Need Before Importing Repeater Frequencies
Before you start importing repeater data, gather a few essentials. You'll need a compatible radio, programming software, and a connection cable. Most modern handhelds work fine, Yaesu, Kenwood, Icom, and others all support bulk imports through standard tools.
Your computer needs the right drivers installed. Many cables use FTDI chipsets, which require drivers from your cable manufacturer. Download these before you plug anything in. Without proper drivers, your computer won't recognize the cable at all.
You'll also need a CSV file with your repeater data. This is a simple text file that lists frequencies, offsets, tone settings, and other details. The good news: you don't create this from scratch. Online databases handle that part.
Finally, check your radio's memory capacity. Most handhelds store 200-500 channels. If you're managing multiple radios or large frequency lists, know your limits upfront. This prevents frustration when you discover a radio can't hold all your data.
Downloading Repeater Data and Importing CSV Files to Radio Software
Accessing RepeaterBook and Other Frequency Databases
RepeaterBook is the most comprehensive source for repeater frequency data in the United States. According to the 2026 ARRL Repeater Directory powered by RepeaterBook, this database contains frequencies for thousands of active repeaters across all major bands.
To access RepeaterBook, visit their website and use their search tools. You can filter by location, frequency range, or band. The interface lets you narrow results quickly. Want all 2-meter repeaters within 50 miles of your city? Select those criteria and generate your list.
Other frequency databases exist, but RepeaterBook dominates for amateur radio use. The data syncs with the ARRL directory, so you're getting current, verified information. This matters because outdated frequencies waste your time and memory slots.
Once you've found your repeaters, the next step is generating a file your radio software can read.
Generating Your CSV File for Bulk Upload
CSV stands for comma-separated values. It's a plain text format that every radio programming tool understands. RepeaterBook and other databases can generate these files automatically.
Look for an export or download button on the database site. Select your repeaters and choose "Export as CSV." The system generates a file with columns for frequency, offset, tone type, and other settings. This file is ready to import into your radio software.
The format matters. RepeaterBook's technical documentation on CSV generation confirms that standardized templates like NMFCC-chirp.csv work across all major programming platforms. These templates ensure your data imports correctly without manual editing.
Some tools let you customize the CSV before download. You can choose which bands to include, 144MHz, 222MHz, 440MHz, or all of them. This flexibility saves memory space on your radio by excluding frequencies you'll never use.
Save the CSV file somewhere easy to find. Your desktop works fine. You'll need to locate it quickly during the import process.
Step-by-Step Process: How to Bulk Import Repeater Frequencies
Reading Your Current Radio Image
Start by reading your radio's current configuration. This creates a backup of everything already in your radio's memory. If something goes wrong during import, you can restore this backup.
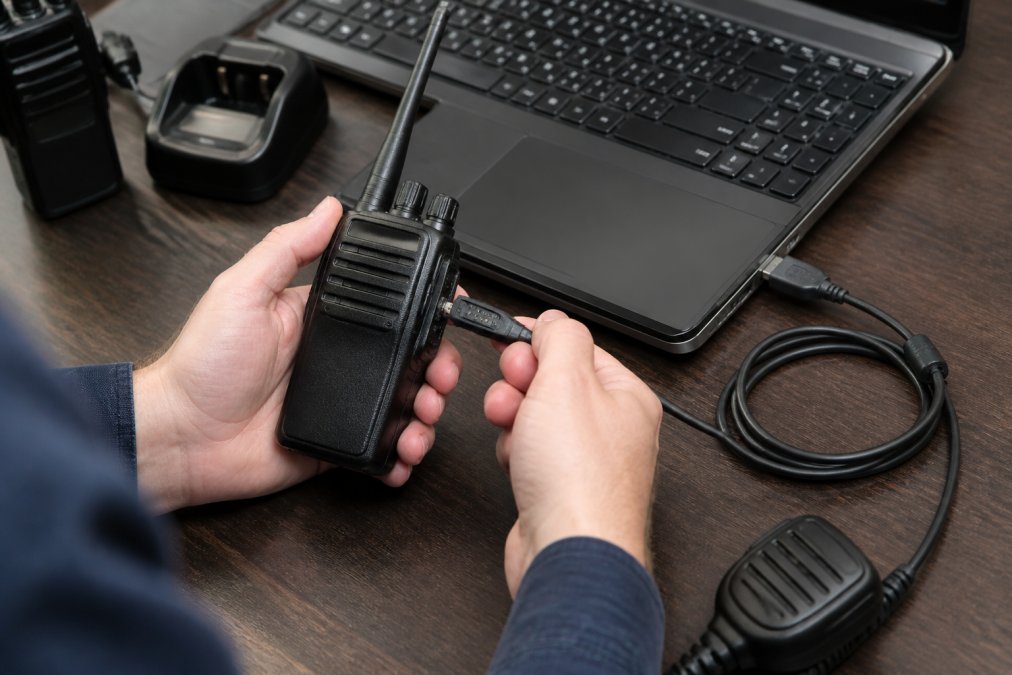
Open your programming software and connect your radio via the programming cable. The software should recognize the radio automatically. If it doesn't, check your drivers and cable connection.
Click the "Read" button in your software. This pulls all current data from your radio into the program. The process takes seconds to a few minutes depending on your radio model and connection speed.
Save this file immediately. Name it something clear like "YourRadioModel_Backup_Sept2026." Store it in a separate folder from your CSV export. This backup is your safety net.
Importing the CSV File Without Overwriting Channels
Now open your CSV file in the programming software. Most tools have an "Import" or "Add Channels" option. Click it and select your CSV file.
The software shows you what's about to import. Review the list. Check that frequencies look correct and tone settings match your needs. This is your last chance to catch mistakes before they hit your radio.
Here's the key part: select "append" or "add" mode, not "replace" mode. Append mode adds new channels to your existing memory. Replace mode wipes everything and starts fresh. Unless you want to erase your current setup, use append.
According to RepeaterBook's import documentation, users can select specific search criteria and generate data that imports directly without overwriting existing memory channels. This means your club frequencies, personal repeaters, and other saved data stay intact.
The software processes the import. Most operations complete in seconds. You'll see a summary showing how many channels were added.
Uploading Your Modified Radio Image
After the import completes, click "Write" or "Upload" to send the new data back to your radio. This transfers all channels, old and new, from your computer to your radio's memory.
The upload process is slower than import. Expect 30 seconds to 2 minutes depending on how many channels you're loading. Don't disconnect the cable during this time.
Your radio may display a progress bar or status message. Wait for it to finish. Once complete, your radio beeps or displays a confirmation. Disconnect the cable.
Power on your radio and scroll through the memory channels. You should see your new repeaters mixed with your existing frequencies. Scan mode now includes all of them.
Troubleshooting Radio Frequency Import Errors
CSV File Format Issues
The most common import error is a malformed CSV file. This happens when the file structure doesn't match what your software expects.
Check the file extension. It must end in .csv, not .txt or .xls. Windows sometimes hides file extensions, so look carefully. If you see "frequencies.csv.txt," rename it to "frequencies.csv."
Open the CSV file in a text editor like Notepad. Look at the first row, it should contain column headers like "Frequency," "Offset," "Tone," and "Mode." If headers are missing or misspelled, your software won't recognize the data.
Verify that commas separate each field. Spaces around commas can break imports. If you see "Frequency, Offset, Tone" with spaces after commas, remove them: "Frequency,Offset,Tone."
Some databases generate files with special characters or extra blank rows. Delete blank rows at the end of the file. Remove any special formatting. Save it as plain text only.
Firmware Compatibility and Driver Problems
Driver issues block communication between your computer and radio. If your software can't detect your radio, the drivers are likely missing or outdated.
Visit your cable manufacturer's website. Download the latest FTDI drivers for your operating system, Windows 11, Windows 10, or Mac. Install them and restart your computer. Then plug in your cable and try again.
Some radios have firmware limitations. Older models may not support certain import methods. Check your radio's manual or manufacturer website for firmware version requirements.
If your radio uses custom firmware, it might conflict with standard programming software. Reflash your radio with factory firmware to restore compatibility. This erases your memory, so restore your backup afterward.
Test your cable with a different USB port.
Memory Channel Conflicts
Your radio has limited memory slots. If you're importing more channels than available space, the import fails.
RT Systems Programming Software Features for Bulk Frequency Management
RT Systems, Inc. specializes in radio programming software that handles bulk imports cleanly. Their tools support many radio brands and include features built specifically for frequency management.
Managing Memory Channels and Band Plans
Smart memory management separates working frequencies from clutter. Band plans help you organize by frequency range and purpose.
Compliance and Best Practices for Frequency Coordination
Frequency coordination matters. Using uncoordinated frequencies creates interference and violates FCC rules. Always verify that repeaters you're importing are officially coordinated in your region.
Frequently Asked Questions
Can I import RepeaterBook data directly into my radio software?
Yes. RepeaterBook provides CSV file generation tools that work with most radio programming software. You can select specific search criteria like location or frequency range, generate a CSV file, and import it directly into your radio's memory without overwriting existing channels. The process uses the standard Read-Import-Upload methodology supported by CHIRP and other programming platforms.
What file format is best for bulk importing radio frequencies?
CSV (Comma-Separated Values) is the industry standard for bulk importing repeater frequencies. Standardized templates like NMFCC-chirp.csv work effectively for specific frequency bands including 144MHz, 222MHz, and 440MHz. Most programming software accepts CSV files and allows you to import multiple frequency lists into a single radio image without data loss, making CSV the most reliable format for managing large frequency lists across different radio models.
What are common errors when bulk importing repeater data?
The most frequent issues include CSV formatting errors (incorrect column headers or delimiters), firmware compatibility problems that prevent the programming software from reading your radio, and memory channel conflicts when importing into a radio that already has stored frequencies. Some users report that custom firmware can interfere with standard programming software like CHIRP, requiring a factory firmware reset to enable bulk CSV imports. Checking your radio model compatibility and ensuring your CSV file matches your software's template format prevents most import failures.
How do I ensure my imported repeater settings comply with FCC regulations?
Verify that all imported frequencies fall within authorized amateur radio bands and that offset frequencies and tone squelch settings (CTCSS/DCS codes) match your local frequency coordination committee's requirements. The ARRL Repeater Directory, powered by RepeaterBook data, provides frequency coordination information. Always cross-reference imported settings with your regional band plan and confirm duplex mode settings are correct before uploading to your radio to maintain compliance with FCC amateur radio rules.